This document
explains how to build Visual-MinGW sources.
0. Requirements:
Last MinGW
distribution or at least latest Windows
API package. (w32api)
For more information, follow the troubleshooting
steps further in this page.
1. Vmdeps
Vmdeps is a renamed makedepend.exe from
xfree86 project. It's the dependency generator that
Visual-MinGW uses.
From the File menu, click Open
Project..., browse to "Visual-MinGW\Projects\vmingw\local\vmdepend"
and load "makedepend.vmp".
In the
Build menu, click Build to compile the
project.
Then click Project/Explore and
run install.bat.
2. WinUI
WinUI is the C++ library that
Visual-MinGW uses.
From the File menu, click
Open Project..., browse to "Visual-MinGW\Projects\vmingw\local\winui"
and load "winui.vmp".
In the Build
menu, click Build to compile the project.
From the project explorer, open "install.bat",
modify MinGW's lib and include paths accordingly, for
example "D:\Msys\1.0\mingw\lib" and
"D:\Msys\1.0\mingw\include\wui" click
Format/Convert/DOS.
Save the file.
Click Project/Explore and run
install.bat.
Check that all files were copied in
"install.log" and in the target directories
before continuing.
3. Build Visual-MinGW
Load "vmingw.vmp" from "Visual-MinGW\Projects\vmingw\local"
and click Build.
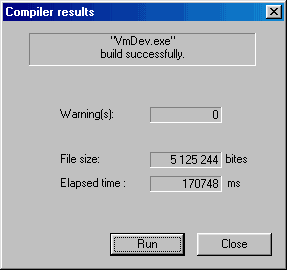
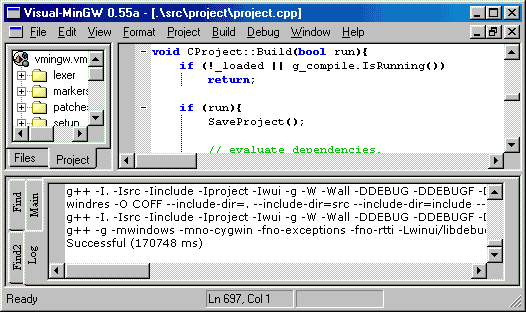
Building Visual-MinGW.
The Log
View details all command lines passed while compiling
and linking.
4. Running Visual-MinGW
From the Compiler results dialog or Build
menu, click Run.
When first run, since the ini file isn't created
yet, you'll see the installation steps again, this time
you can ignore and just click "Cancel"
as the newly created instance of Visual-MinGW will inherits
of the main instance's environment variables.
One major difference though, is that you need to
allow a second instance of the application to
run. When the Preferences dialog will show up,
select the general tab and disable the Single
Instance option.
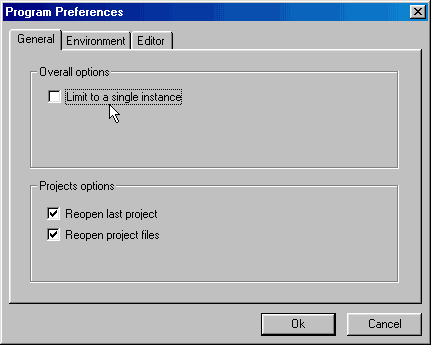
The Single Instance option
needs to be disabled
in order for Visual-MinGW to
run itself.
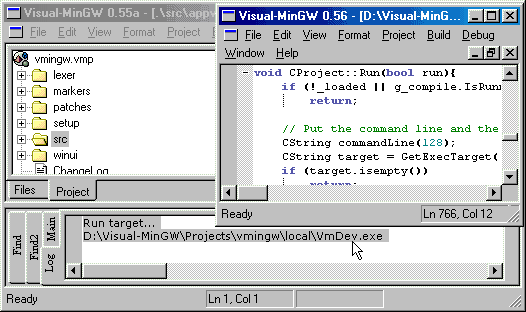
Visual-MinGW 0.55 runs Visual-MinGW
0.56.
5. Troubleshooting
Compilation errors might indicate that you need a
recent version of Windows
API package or that you need to patch your MinGW
headers.
- Check the version of your w32api package
Open "MinGW\include\_mingw.h" and search version
macros, for example:
#define __MINGW32_VERSION
3.1
#define __MINGW32_MAJOR_VERSION 3
#define
__MINGW32_MINOR_VERSION 1
The w32api version above is 3.1.
- Install Windows
API
Get the distribution from MinGW project.
Unpack the archive into your MinGW directory.
New
files must overwrite old ones, so you must ensure that
the target directory is correct when extracting files.
- Check if you need to patch your headers
This happens when some changes were submitted to MinGW
developers, meanwhile a new release of w32api is available.
Patches are stored in "Visual-MinGW\Projects\vmingw\local\patches\w32api"
or "local\patches\w32api" in the cvs repository.
Copy the diff file to your "MinGW" directory,
then from an Unix shell, "cd" to that directory
and run GNU patch.
Remove the patch from MinGW directory.
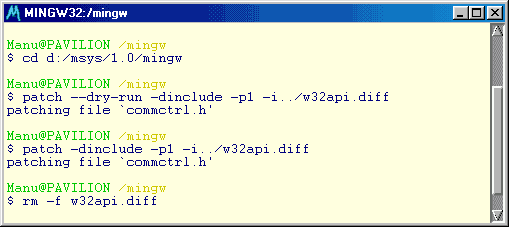
Patching MinGW headers, "--dry-run"
permits to test the patch without changing target files.
(Note that you can revert changes with
the "-R" option, example "patch -R -dinclude
-p1 -i../w32api.diff")
|